
6 easy ways on how to tie-dye shirts
The tie-dying trend is the most versatile fashion trend, and it keeps emerging after every few years. And that’s the reason why many people are also eager to know how to tie dye shirts!
Well, as the name suggests, the Tie-dying is process is as simple as it sounds. Tie Twisting a T-shirt or other cloth item using different techniques, tie it tightly in several places with a fiber string or rubber bands and then dye it.
Waiting patiently for the surprising result is also a part of the whole process of how to tie dye shirts! Once finished, the fabric’s folded and twisted areas reveal worth waiting and fascinating colored patterns. The entire tie-dye process is as fun as it is trendy.
Be it pretty pastel denim, colorful sweatshirts, T-shirts, sleepwear, loungewear, shoes, or even socks. You can use the simple tie dye technique to make unique, eye-catching patterns. All you need to do is follow the following simple tips & tricks to solve the riddle of how to tie dye shirts.
Related Articles
Gen Z Fashion Trends
How to Get Tiktok Famous in 3 Easy Steps
Tips on How to Get Instagram Followers Fast
Tie-Dye Essentials
Creating a tie-dye piece of clothing is a unique and straightforward way to spend your day productively. Here’s what you will need to tie-dyed shirts:
- A white 100% cotton T-shirt or any other cloth
- A tie-dye ink kit or multiple dye colors
- Squeeze bottles
- A piece of fiber string or rubber bands
- Latex gloves
- Zip locked plastic bags
- Warm Water to add to the ink bottles
- A spray bottle of water to dampen cloth before applying ink
- Rags, newspapers, plastic wrap, or paper towels for spills
Tip #1: Get Set
If you have bought a new T-shirt, then the machine washes it first and dry thoroughly. However, try not to use a dryer sheet or fabric softener to avoid leaving any residue on the shirt that may resist the dye to absorb. Cover your workspace with rags, newspapers, or paper towels.
Related Article: Best Spots to Go on a Summer Vacation
Tip #2: Prepare Your Dye
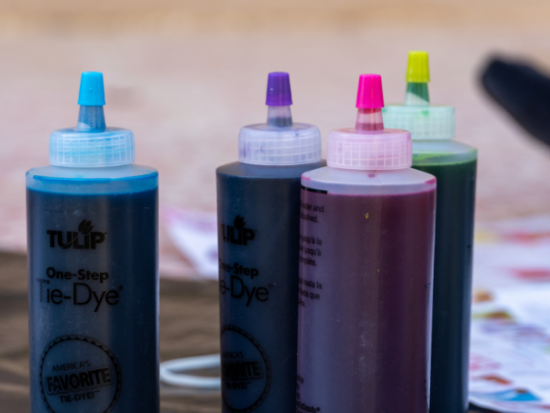
Suppose you are using a kit, set up the dye in the bottles following the tie-dye instructions. If you have liquid or powered paint, mix it up according to the package’s instructions. Then put the ink into the squirt bottles.
But remember to cover your mouth if you mix the dye powder yourself to avoid inhaling the dye powder into your lungs.
Quick tip alert! Always use bright colors for your shirts as they look even more incredible!
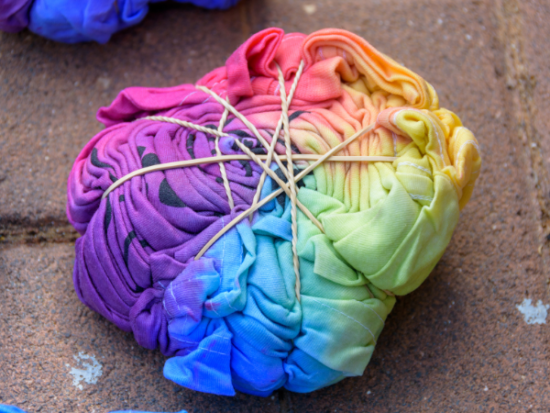
Tip #3. Tie the Shirt
To dampen the shirt, spray it with water. Twist the shirt and wrap it tightly using string or rubber bands to secure it in any pattern of your choice.
The tie-dye works best on 100% cotton, but you can also take 50% polyester/50% cotton. But the final look will not be as rich or vibrant. Don’t forget, the dyes bond perfectly well with natural fabrics, such as silk cotton and rayon.
Related Article: Top Trending Social Media Apps
Tip #4. Dye the Shirt
Once you have your shirt banded or tied tightly, it is time to dye it! Wear your latex gloves and apply dye to your cloth following the instructions on the tie-dye kit of the twisting or folding technique.
Don’t forget to limit unwanted cross-contamination between colors that might mix into a not-so-attractive color. To avoid it, use the following tips and tricks mentioned for standard step-to-step tie-dye.
- Spurt a generous quantity of dye onto your shirt
- Let the portions soak for a while before adding more color
- If required, flip your tie-dye cloth over and apply dye to the other half of the shirt.
Quick Tip Alert! Remember, tie-dye is all about being bold and bright, so don’t hesitate to be creative!
Tip #5. Let the Shirt Dry
After you are done squirting the dye on the shirt, carefully place it into a zip lock bag and seal it uptight. Keep the plastic bag in a warm place and let it dry for NO LESS THAN 24 HOURS!
The dye needs ample time to allow the gorgeous colors to bond with the fabric thoroughly. While unwrapping your shirt put rubber gloves on.
Tip #6. Rinse it
After waiting patiently or desperately for 24 hours, please take out the shirt from the bag and rinse it with cold water (don’t remove the rubber bands) until the water runs clear of the dye. Now remove the rubber bands, rinse again, then wash in the machine and dry the shirt.
Avoid combining the shirt with any other clothing item for that initial wash and dry thoroughly if any extra dye bleeds. When it’s completely dry, get ready to flaunt your shirt!
Related Article: 7 Best Hiking Gear on Amazon
4 Simple Techniques to Create Tie Dye Patterns
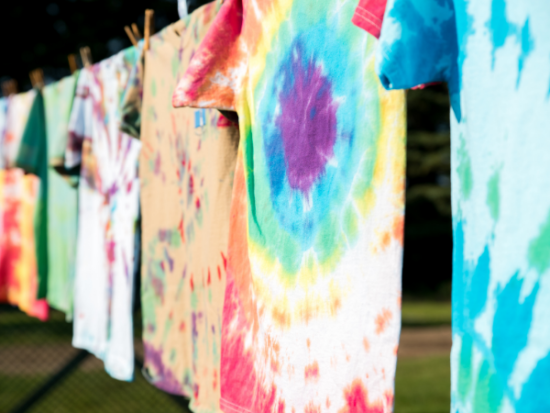
There are endless possibilities when it comes to creating tie-dye patterns. Choose from a traditional swirl/spiral, try your hand at the marbled technique, use striped, or design a circle pattern.
With various designs to pick from, you can always create new tie-dye pieces and make them look exceptional. The beauty behind the tie-dye project is that you can make anything that is truly one of a kind. Here’s the step-by-step guide to making different tie-dye patterns.
The Traditional Swirl Pattern
- Pull the shirt from the center and swirl/twist in the right direction. Let the entire shirt form a crushed disc shape like a rose.
- Wrap the rose with four to six rubber bands in an overlap and crisscross pattern tightly. It will give you six quadrants of fabric.
- Wear your rubber gloves and squirt at least two to three bright dye colors onto the wedges formed by the rubber bands.
- To finish, repeat the same procedure on the back of the shirt.
Marbled or Crumpled pattern
- Lay the shirt flat, twist it with your hands, turn, and crumple it like a paper piece.
- Pull out the shirt’s little pieces by pinching your fingers to bring the shirt up to where you will apply the dye.
- Continue to crumple the shirt randomly.
- Take more than a few rubber bands and tie them tightly into quadrants.
- Put your rubber gloves on, pick the dye and saturate each quadrant.
Related Article: Android Apps crashing? Here’s What to Do
Striped Pattern
- Fold the shirt from the bottom upside into small pleats until the shirt in the shape of a thin & long log.
- Take five to eight rubber bands and tie them evenly across the pleated shirt.
- Choose a different colored dye for each section between tied rubber bands, ensuring the dye is entirely absorbed through each pleating layer.
- Make sure the shirt is soaked all the way around.
Bull’s Eye or Circle Pattern

- Take the areas where you want the bull’s eyes or circle to appear. Three circles are ideals.
- Pull a little bit of the fabric up in these areas, then twist and pinch using your fingers and wrap with a rubber band at the base, so the shirt sticks up above it.
- Repeat the same steps on the other parts where you want a circle pattern.
- Choose the color your choose and squirt on the circular parts above the rubber band. Make sure the dye is saturating through.
- Squirt both front and back, avoiding where the circle dye is.
To Conclude
That’s everything you needed to know about how to tie dye shirts. The actual simple process of tie-dying is something that anyone can try! If you put your mind to it, you can tie-dye anything. Just make sure you do it right and follow the tips mentioned above! Which tie-dye pattern do you like the most?
