Installing an EV charger at home? Here’s a simple 5-step checklist
EV charger installation is a very broad and varied topic and, unfortunately, often one that lacks clear-cut answers. Every home is different and will likely require unique installation details, so the costs associated with setting up EV charging at home will vary. For many newer homes, installing an EV charger may cost just a few hundred dollars. But for many other homes, including older ones, the price of getting EV charging capability can easily run into the thousands.

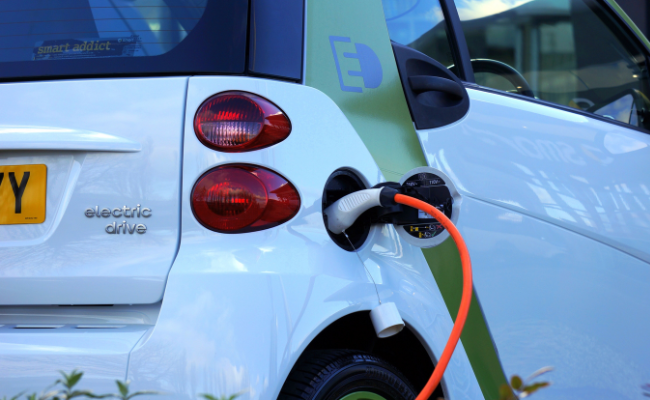
The cost of charging at home is pennies on the dollar compared to filling up with gasoline. FILE PHOTO
Sounds expensive? Well, it can be. And most likely, that’s your main motivator for installing an EV home charger yourself. Before you do, you should know that there are tax credits that can help alleviate the costs of the charger and installation. There is a federal tax credit that covers up to 30 percent of total charger and installation costs, up to $1,000. Additionally, there are often state-level — and sometimes even county- or city-level — credits that can be combined with the federal credit. Because of the hazards of working with electricity, many homeowners choose a professional EV home charger installer. But if you’re still interested in installing your own EV charger at home, Edmunds can help with the step-by-step preparation process.
Step 1: Determine whether your home’s amp service size is adequate
The first thing you should know is the size of the house’s electrical service in amps. The minimum you will find in many older homes is 100-amp service and that’s generally not sufficient for adding an EV charger to the home’s electrical circuit. Consider 200-amp service as the minimum you will need to run an EV charger at home along with your refrigerator, washer and dryer, and heating and air-conditioning systems.
If you don’t have at least 200-amp service, you will need an electrician to get more electricity flowing into the house, as well as probably upgrading the electrical panel that contains your home’s circuit breakers. This is the aspect of home EV charger installation that can be very expensive — up to several thousands of dollars. Many older homes lack 200-amp service, so be sure to get at least a few quotes from electricians to find out what this potentially expensive work will cost.
Step 2: Choose the right charger
Right now, the most powerful home EV chargers are rated at 80 amps, and if you have a large electric SUV or pickup, such as a GMC Hummer EV or Ford F-150 Lightning, that’s probably what you will want for overnight charging capability. For a compact or midsize EV, such as a Hyundai Kona Electric or Tesla Model Y, 40-50 amps will more than suffice for overnight charging. Check out our guide on how to get the best home charger for your plug-in car to help you determine the best EV home charging setup for your needs.
Step 3: Choose the location for the charger
When choosing the location for your home EV charger, there are many options. As long as your cord reaches your car, you have a multitude of places to select from. We recommend installing an EV charger indoors whenever possible, but because the unit and cord are water- and weather-resistant, installing outdoors doesn’t have to be a deal-breaker.
However, be sure to consider the distance your charger is installed from the house’s main circuit panel. The closer in proximity, the less wiring will need to be fed between the two, which means lower cost. Popular places to install an EV home charger are both inside and outside of the garage, in the driveway, or on the back wall of the property. Also, exercise common sense: Don’t flaunt your charger in public view, if possible. Don’t put yourself at risk of vandalization or theft.
Step 4: Install the charger
You will need to get 240-volt power to the charger, which can be accomplished either through a hardwired connection or via a NEMA 14-50 outlet — the kind your dryer is likely plugged into. A hardwired connection should be considered necessary for anything over 40 amps coming through the charger, and due to the batteries in many EVs only getting larger, it may be wise to go with a hardwired connection so that you can install a higher-power charger later if necessary.
Step 5: Inspection
Once it’s installed, you should make an appointment with your local municipality to have the charger installation inspected to ensure it’s up to code. This should be considered an essential step, not just for compliance with local laws but also to make sure the installation is safe. There is a lot of electricity coursing through your home charger setup, so ensuring the installation was done correctly and up to code should be considered a mandatory final step.
In conclusion
Home EV charging is absolutely the way to go — if your living situation is compatible. The cost of charging at home is pennies on the dollar compared to filling up with gasoline. Home charging is fundamental to keeping EV running costs significantly lower than for gas-powered cars; without it, running an EV by relying on public charging can be nearly as expensive as running a gasoline-powered vehicle.
This story was produced by Edmunds and reviewed and distributed by Stacker Media. It has been re-published pursuant to a CC BY-NC 4.0 License

