
How to Make a Bow for a Gift
With the holidays around the corner, many people are ready for creative projects and DIY activities. So many of us want personalization; thus, learning how to make a bow can be useful. Adding personal touches to gifts makes gift-giving more meaningful.
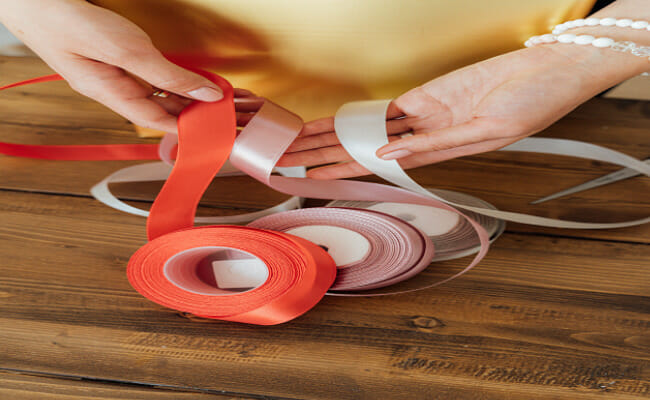
Let’s add a little more sparkle to make your gifts stand out. How? That unique sparkle lies in the bow or ribbon. Adding a bow decoration to a gift makes a huge difference. It adds color, excitement, and a hint of a pleasant surprise to the recipient.
To make your gift more personal, take it a notch higher by making homemade bows. Creating cute bows is a fun DIY activity. Don’t worry and relax. It is not intimidating or stressful, even for newbies. In addition, you might enjoy the action. This article will discuss making three types of stunning bows that will ‘wow’ any gift.
Bows for gifts and decorations
Though there are various ways to make bows, the simple twist bow, double-looped bow, and bouquet bow are the most popular bow types. They are easy to create, too, with a few steps. If you are for this fun challenge, read this article, learn, and enjoy bow-making!
1. How to Make a Simple Twist Bow
A simple twist bow will do the trick to adorn a gift perfectly. The bow is simple, hassle-free, and easy to do. You can use any ribbon color and pattern.
What You’ll Need for a simple twist bow:
- Pair of scissors
- 2.5-inch wide ribbon (any color or design you like)
- Pipe cleaner (holds the ribbon in place).
Basic Instructions:
- The first step is to construct a tail. Unroll your ribbon by 8 inches. Afterward, pinch at the top to hold your place.
- Create a loop. Uncoil 8 inches of the ribbon, squeeze it in place and fold it in half to create a loop.
- You must unroll another 8 inches of your ribbon, pin it, and fold it in half to connect with the others.
- Take out any excess ribbon. Be sure to cut off the extra ribbon, leaving both loops with tails on both sides.
- Hold the ribbon in place. Get your pipe cleaner and twist it around the pinched area. The twisted pipe cleaner keeps the ribbon together.
- Add your newly-created bow to a gift by sticking it with a glue gun.
- Use different colors and patterns as desired.
2. How to Make a Double-Looped Bow
PHOTO CREDITS: Pinterest
Now, if a simple twist bow looks good on a gift, a double-looped bow makes it twice stunning! Are you ready to learn to make a double-looped bow? The DYI activity is easy to do and requires a hot glue gun. The result is twice as spectacular.
What you will need for a double-looped bow:
- Two 14-inch pieces of 2.5-inch wide ribbon
- One 12-inch piece of 2.5-inch wide ribbon
- One 6-inch piece of 2.5-inch wide ribbon
- Pair of scissors
- Pipe cleaner
- Hot glue gun
Basic Instructions:
- Make a loop first. Then hot glue the ends of your 12-inch and 14-inch ribbon to create the two loops required.
- After making the two loops, glue them together. Add glue to the larger loop. Then, add the smaller one on top.
- Next, put the remaining 14-inch ribbon underneath the glued loops. Afterward, pinch them together in the middle.
- Lastly, make an accordion fold. But first, secure your bow with a pipe cleaner. Then, twist it over the folded parts in the middle. In this way, you keep all the pieces together.
- Add your double-looped bow to your gift by sticking it with a hot glue gun.
How to Make a Bouquet Bow
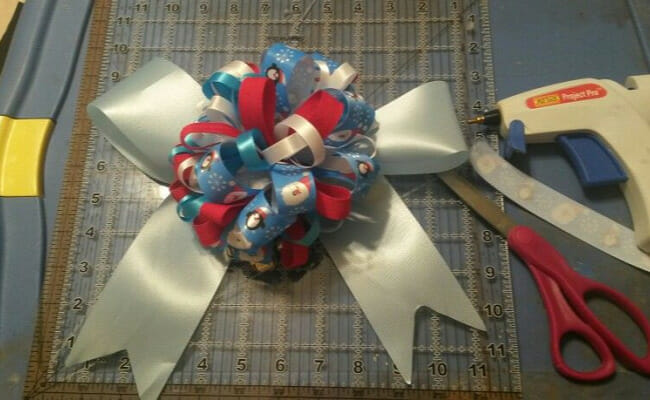
PHOTO CREDITS: Pinterest
Now, if it is something fancier you want, go and create a bouquet bow for a wreath or a special gift to a loved one. Don’t get stressed. Like the simple twisted bow or the double-looped bow, the bouquet bow is something you can quickly work on. Since it is a fancier bow for a gift, you can opt for different colors or patterns.
What you will need for a bouquet bow:
- Three pieces of 20-inch ribbons with 2.5-inch width
- Three pieces of 20-inch ribbons with 2.5-inch widths in different patterns
- Three pieces of 20-inch ribbons with 1.5-inch width
- Pair of scissors
- Zip tie
Basic instructions:
- The first step is to create a loop: Get a ribbon and measure down 12 inches. Hold the spot. Then, fold your ribbon in half to create a loop.
- Follow this step for all of the ribbons you will make. Make an accordion fold. Keep your thumb in the middle so the ribbons stay together.
- Fluff the ribbons. Move the ribbons around and fluff them up to create a fun, glam look.
- Afterward, secure the ribbons by wrapping a zip tie around the middle pieces to keep them in place.
- Cut off the excess zip tie, so it doesn’t stick out. You can also cover it with an extra ribbon piece for a ‘cleaner’ look.
- Stick your bouquet bow on your gift or wreath with your hot glue gun.
- Feel free to use it as additional decor in your place.
- Make more bouquet ribbons depending on the size of the wreath.
Conclusion

Whether young or old, it is always fun learning new things. Doing something ‘homemade’ is always enjoyable. Since the next few weeks will be a flurry of activities, prepare your list ahead of time. Buy your presents and packaging materials early. Remember, every bow, whether a simple twisted one or a bouquet bow, is meaningful and made from the heart.
