
How to Use a Meat Thermometer
Many people have been learning new skills lately, and cooking is one of the most common. One of its most essential aspects is maintaining the correct temperature. Too much heat could char your meatloaf, while too little could leave it raw after hours in the oven.
Looking at the meal is not enough to verify if you cooked it properly. Your roast chicken or turkey could have golden brown skin, but the meat underneath could still be pink. Slicing it open is not an option because you could dry the meat by returning it to the oven.
Fortunately, a meat thermometer can help you apply the right temperature to ensure your meals are tasty and healthy. We will discuss using this kitchen tool for meat, poultry, thin foods, and combination dishes.
Using a meat thermometer
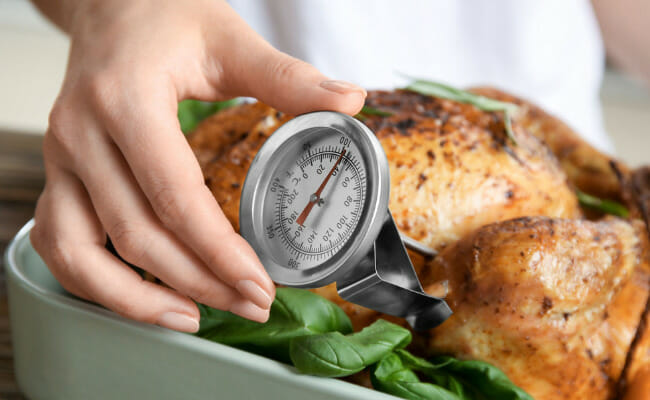
Photo Credit: www.thespruceeats.com
Let us start by discussing how you should use meat thermometers for pork, lamb, and beef roasts. You should insert it into the food during the cooking process while avoiding the bones.
The meat thermometer should avoid the gristle, bone, and fat when you are cooking chops, steaks, and hamburgers. Also, the Food Safety and Inspection Service has additional guidelines for specific meats.
1. Poultry
The FSIS advises people to maintain a minimum internal temperature of 165°F when cooking whole chicken and turkey. You could use higher temperatures for these meats, depending on your preference.
Also, check the inner temperature of the thigh, wing, and the thickest part of the chicken breast. You could also ensure food safety by not stuffing your poultry.
If your recipe requires stuffing, maintain a minimum internal temperature of 165°F for its center. You should also check your dish in various spots if it has an irregular shape. Insert the meat thermometer sideways if needed.
2. Thin foods
You should also use your meat thermometer for boneless chicken breasts, hamburger patties, pork chops, and other flat foods. Specifically, if you want a thermocouple meat thermometer or thermistor could help.
If you have a digital instant-read thermometer, ensure its sensing area is in the center of the food. That portion usually spans two to three inches.
You may want to remove the food from your oven before inserting the meat thermometer so that you do not burn your fingers. Place your food on a plate or spatula, then insert the meat thermometer sideways.
3. Combination Dishes
A meat dish could include other ingredients like eggs or vegetables. Place the meat thermometer into the thickest part of your food or its center.
You could also use that meat thermometer on dishes containing eggs or ground meat. Check it in several spots to ensure the proper temperature throughout your dish.
Calibrating your meat thermometer using ice water
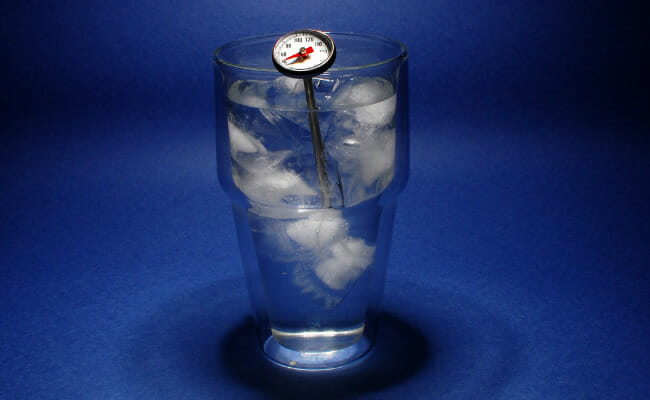
Photo Credit: www.foodrepublic.com
A meat thermometer requires proper maintenance or will provide an inaccurate temperature reading. You can check its accuracy using ice water and boiling water. Here are the steps for calibration that uses the former:
- Start by filling a large glass with finely crushed ice.
- Then, pour clean tap water on top of the ice and stir.
- Dip two inches of your meat thermometer’s stem into the mixture, touching neither the sides nor bottom of the container.
- Afterward, wait for 30 seconds before adjusting it.
- Next, hold the adjusting nut under the head of the meat thermometer and turn the head. The pointer should read 32 °F. Make sure you do not remove the stem from the ice.
Calibrating your meat thermometer using boiling water
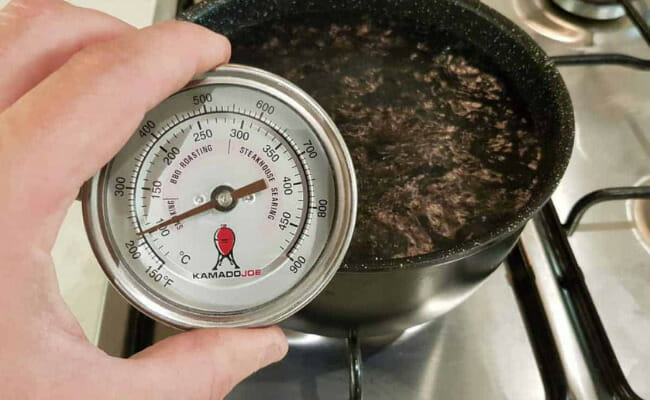
Photo Credit: www.foodfirefriends.com
- Begin by filling a pot of clean tap water to a full boil.
- Next, immerse at least two inches of the stem of your meat thermometer in boiling water.
- Wait for 30 seconds.
- Then, hold the adjusting nut under the head of the meat thermometer with a suitable tool and turn the head. Like the previous method, you should not remove the stem from the pan. Moreover, it should read 212 °F.
Use distilled water for optimal accuracy, or the meat thermometer may not measure water boiling at 212 °F. Remember that your water could boil at lower temperatures if you are in a high-altitude area.
You might be unable to calibrate some meat thermometers, especially the digital ones. If yours shows an inaccurate temperature reading, consider it when reading internal temperature while cooking food.
For example, your meat thermometer reads 214 °F, two degrees higher than the temperature of boiling water at 212 °F. Subtract two degrees from its reading when you are checking your meals.
Types of meat thermometers
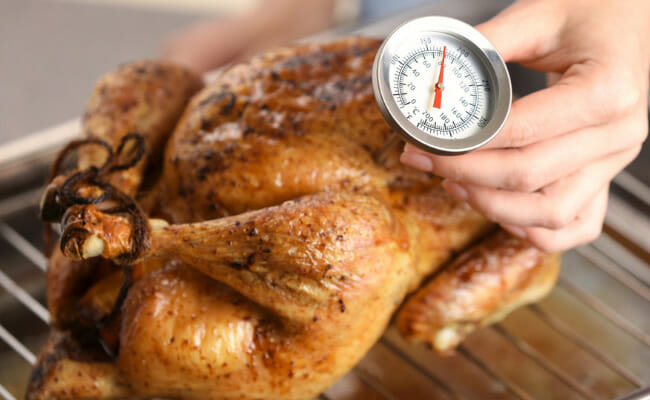
Photo Credit: www.tastingtable.com
You can select from various meat thermometers nowadays. The oldest ones are bimetallic strip thermometers or dial thermometers for short.
A dial thermometer consists of a metal probe with a glass-enclosed dial. The coiled metal strip inside expands with heat, moving the pointer arm further up the dial.
You could leave some of these meat thermometers stuck on a piece of meat while cooking. Others cannot withstand high temperatures, so you must take your food out of the oven first.
Some have different settings for various types of meat. For example, your meat thermometer could have settings for chicken and beef. More importantly, dial thermometers are typically the most affordable type.
One downside is that you may find it difficult to read the dial. The indicators might be too tiny to read, or the glass may become foggy or crusty from food residue and heat.
Some dial thermometers take a minute to provide a reading, increasing the chances of overcooking your meal. Moreover, you need to be careful with the fragile glass dial.
Digital instant-read thermometers
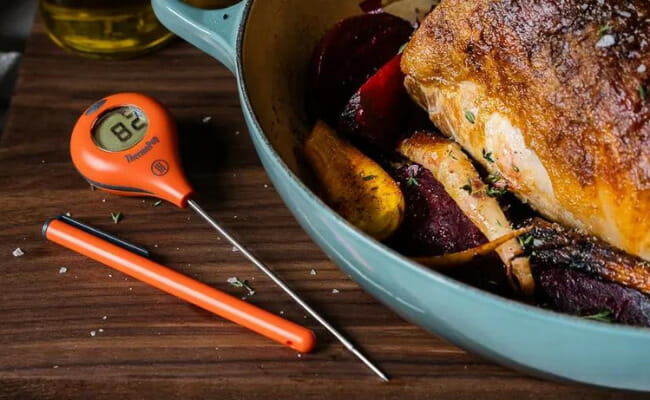
Photo Credit: www.nytimes.com
These tools are your best choice for a quick internal temperature reading. Ensure you have perfectly cooked meat by inserting one into it to receive a reading within seconds.
Digital instant-read thermometers or thermocouples measure internal temperature with the sensors on their stems. Then, the reading appears on its monitor. The best aspect of thermocouples is their numerous features:
- Some automatically turn off when you are not using them, so the battery lasts longer.
- Also, they could show the internal temperature in Fahrenheit or Celsius.
- Backlights and rotating monitors help you view information.
Unfortunately, you cannot leave a digital instant-read thermometer in the food while cooking. You must take the food out of the oven to get a reading. As a result, you delay the cooking time of your meals each time you check them.
Digital probe thermometers
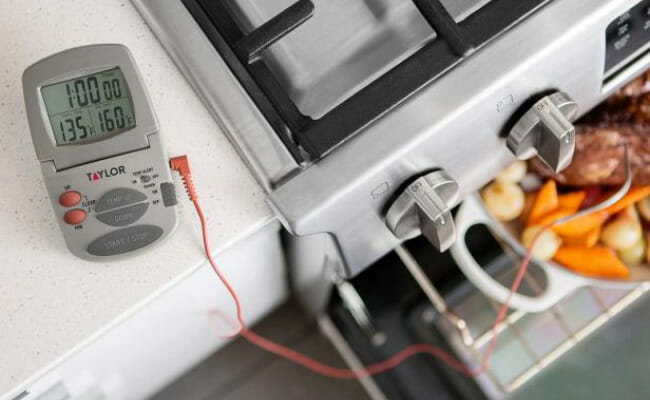
Photo Credit: www.foodnetwork.com
Perhaps you are a meticulous cook who checks the temperature frequently. If that is the case, you may want to use a probe thermometer for future recipes.
You may leave it stuck on the food, unlike the other two food thermometers. It consists of a long probe with a heat-proof cord connected to a digital display.
The latter sits outside the oven so that you can safely track the internal temperature. Also, the monitor could beep when your meal reaches a specific heat level.
As a result, the digital probe thermometer works even if you cook more or less than your recipe requires. Most of these tools double as kitchen timers, so they can tell you when you have finished cooking a meal.
Digital thermometers are compatible with ovens, smokers, and grills. The cord fits through grates, so you look at the screen from outside a closed lid.
However, they are usually more expensive than the other meat thermometers because you pay for more features. Choose the one that fits your cooking style to maximize value for money.
Another downside is that the cord can wear down after repeated exposure to high temperatures. Still, the ones from high-quality probe thermometers can last for an extended period.
You should look for quality when shopping for your first meat thermometer. Look out for these factors:
Temperature range and accuracy
A thermometer measures heat, so make sure yours consistently provides an accurate reading. Specifically, look for the ones that have accuracy within ±2˚F. That will ensure an accurate reading for perfectly cooked meat every time.
On the other hand, range refers to the minimum and maximum temperature that your thermometer will read. The ideal choice will depend on your cooking preferences.
You may need a meat thermometer with a wide range if you cook large meals with extended cooking times. Alternatively, a limited range is ideal if you need higher accuracy or quicker response times.
Read the instructions carefully to see the safe internal temperature for your thermometer. Also, it should be able to handle direct cooking and flare-ups.
Probe size
Your thermometer should have a probe long enough to reach the center of your food. That length may vary based on your usual recipes.
A short probe is fine if you cook chicken fillets, fish, and other flat foods. On the other hand, you will need more length if you often cook steaks or pork roasts around five inches.
That tube should be thin enough to avoid damaging the meat. Otherwise, you could break your food apart and dry out its insides.
Interface
You should be able to read the information on your meat thermometer, regardless if it uses a dial or a digital screen. Pick another one if you cannot see the numbers immediately.
If you are buying online, watch a few video reviews first. See the product in action to understand how your experience may turn out.
Visit review websites to learn more about your chosen meat thermometer. Moreover, read what people say about these products on social media platforms.
Alternatively, you could head to a store to check the meat thermometers. Of course, you cannot test it on an actual recipe before buying!
Instead, retailers offer demo units of their products. Some will have stickers on the screen representing what the numbers may look like during use.
Battery life
You may skip this part if you are looking for dial thermometers. Digital ones have built-in rechargeable batteries, while others use removable ones.
Ensure that your thermometers function for the duration of your cooking session. Read online reviews to learn how long a specific meat thermometer lasts for some people.
You might be wondering why anyone would choose one with removable batteries. Both batteries degrade over time, but you cannot easily replace the rechargeable ones.
Digital thermometers with removable batteries might be the best choice if you do not cook often. Perhaps you only need one during special events like Thanksgiving dinner.
On the other hand, a rechargeable meat thermometer might suit you if you cook daily. Maybe you choose home cooking to follow a diet or reduce spending.
Cleaning your meat thermometer
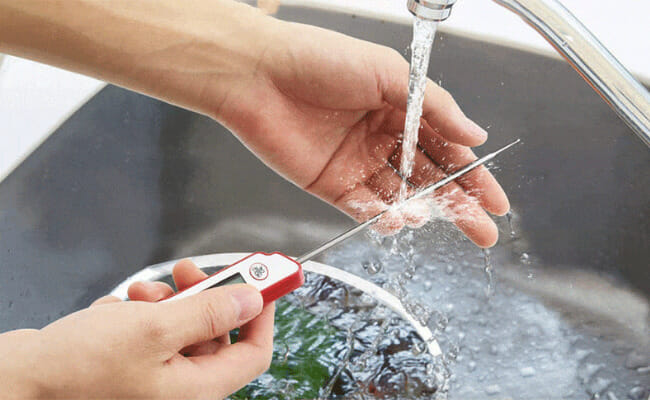
Photo Credit: buythermopro.com
You should sanitize your meat thermometer to keep you and your family safe. Here are four ways you can do that:
- Clean your meat thermometer with hot water and soap. Rinse it with hot water and leave it to dry on a clean paper towel.
- Rub 70% isopropyl alcohol on your meat thermometer to sanitize. Soak a cotton swab with alcohol, then apply it to the prong. Then, rinse the tool with cool water to remove traces of alcohol. Alternatively, you may soak the meat thermometer’s stem in hydrogen peroxide or alcohol, then rinse it with water.
- Sanitize your meat thermometer in boiling water for a minute to eliminate bacteria. However, do not submerge the entire thermometer to avoid damaging it.
- Mix water and chlorine bleach to create a sanitizing solution. Next, soak your meat thermometer for ten minutes. Afterward, wash it with soap and hot water, then let it dry.
Conclusion
Meat thermometers can make homecooked meals easier and safer. They help you cook your meals thoroughly to avoid potential health risks.
You could go traditional by using a dial thermometer. On the other hand, a digital instant-read thermometer lets you check a cooking project quickly.
The probe thermometers show how the temperature shifts during your session. Nowadays, you can find many options that fit your needs and budget.
Frequently asked questions
Do you leave a meat thermometer in while cooking?
You can leave a probe meat thermometer throughout the cooking process. Meanwhile, you may only use a dial and digital meat thermometer after taking your dish away from the cooking appliance.
How do I know if my meat thermometer is accurate?
A food thermometer will provide an accurate reading with a range of ±2˚F. Also, you may calibrate your meat thermometer with freezing or boiling water. Read the article above to learn how these procedures work.
