
4th Generation E Star DIY System: Fully Explained
If it’s the middle of summer and you feel like you can’t step outside without feeling sticky and suffocated, and you love tinkering your way through DIY projects – you’ve definitely landed on the right article today!
You may have been fine with only one air conditioner at home or in your office. As time passes, you might start a family or hire more employees. That means more air conditioners, more condensers, and more spending, or does it?
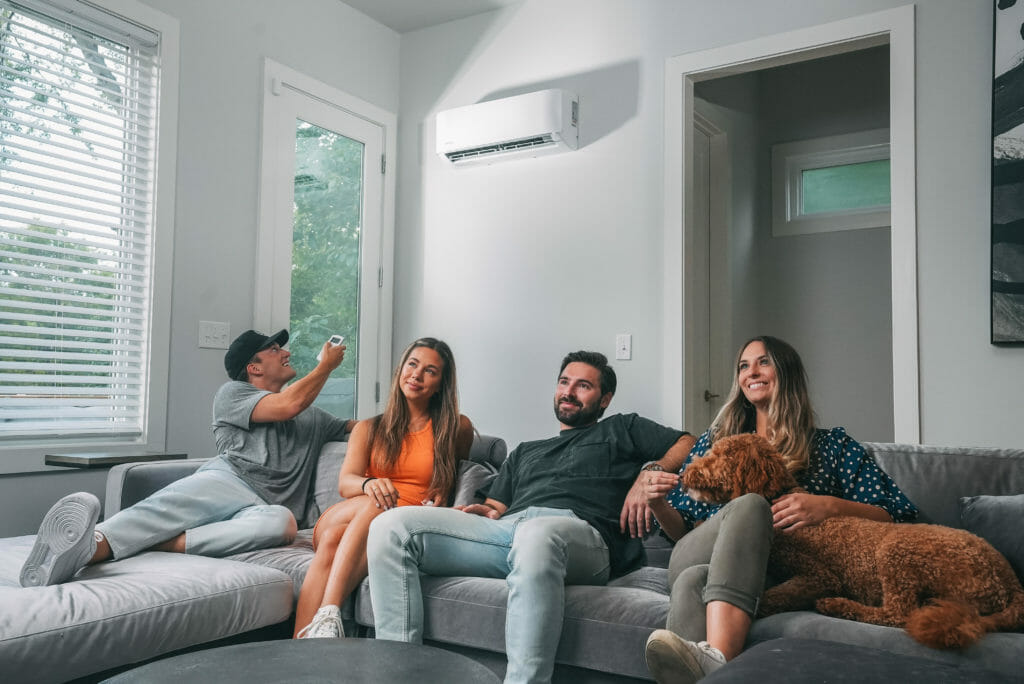
The MRCOOL 4th Generation E Star DIY System is the perfect solution. This mini split system lets you keep the temperature low at your home. You can even use it to cool down specific areas, like your office or bedroom. Plus, it’s more affordable than traditional air conditioners.
We will begin with an overview and then go through its features. Next, we will discuss how the MRCOOL ductless mini split system can help at home or the office. Later, you will see how easy it is to install so you can grab your new MRCOOL AC unit today!
Overview
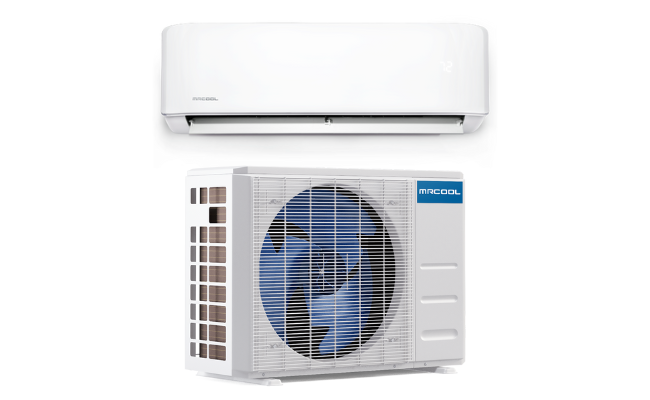
The MRCOOL DIY Mini Split System lets you cool five rooms with only one condenser. It is so easy to install that you only need these three steps: drill, mount, and connect!
As the name suggests, it is the fourth generation of the MRCOOL Ductless Mini Split air conditioner. It now offers more impressive heating and cooling ranges and higher efficiency. Here are the sizes that the MR COOL DIY mini split comes in:
- 12k BTU system that covers 500 square feet
- 18k BTU system that covers 750 square feet
- 24k BTU system that covers 1,000 square feet
- 36k BTU system that covers 1,500 square feet
They also have the five-zone DIY ductless mini-split, which is a 48k BTU unit that covers 1,750 square feet; as well as the 27k BTU condenser, which covers 1,300 square feet. These units are also multi-zone.
With the 3rd Generation, the MRCOOL DIY Multi-Zone could only cover four areas. The current 4th Gen unit can now support five zones!
Features
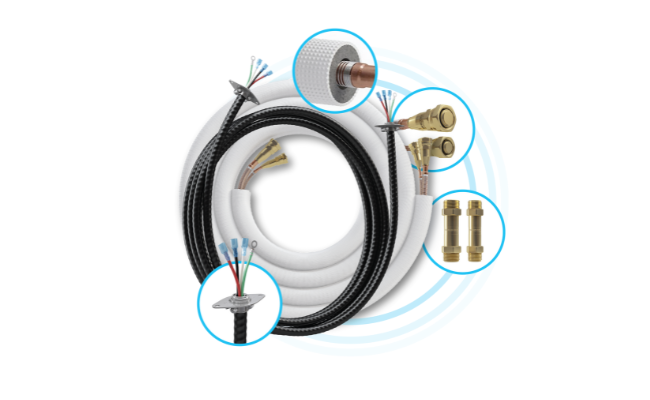
Easy installation – The Pre-Charged R-410 Quick Connect Line Set lets you install the MRCOOL without special tools, training, or equipment. As a result, it provides easy installation, unlike any other ductless heat pump. It also provides couplers for extended lengths.
Energy Star – As the name suggests, the MRCOOL air conditioner has the “Energy Star Certified” rating. It makes sure that you receive optimum reliability and performance.
Smartphone app – Moreover, this DIY installation lets you be Mr. Cool anywhere with the MRCOOL DIY app. Install it on your Android or iOS device to monitor multiple rooms whenever and wherever you are.
DIYPRO Cable – The 4th Generation MRCOOL DIY air conditioner now comes with the DIYPRO Cable. It removes the need for an electrical conduit while ensuring higher mechanical durability and protection.
Follow Me Function – Make sure there is cold air wherever you are with the Follow Me Function. Keep the remote close, and the MRCOOL DIY ductless mini splits will track the surrounding air temperature. That way, it can guarantee maximum comfort.
Leakage detection – The MRCOOL DIY mini split can sound an alarm whenever it detects low coolant levels. As a result, you avoid damaging the compressor. The refrigerant leakage detection ensures your system remains operating efficiently.
Low ambient cooling – Moreover, these ductless mini splits provide low ambient cooling to 5°F (roughly -15°C). This feature makes MRCOOL DIY the ideal system for greenhouses, server rooms, and other settings that require cooling all year.
Auto Restart – MRCOOL’s auto restart feature lets the unit turn on again in case of a power outage.
Sleep Mode – Also, it has a Sleep Mode that lets you save money and sleep better.
Louver Position Memory – The MRCOOL DIY louvers automatically move to the same position where it was last active. As a result, you do not have to adjust the slits every time.
Gold Fin Condenser – Lastly, the MRCOOL DIY mini split has a Gold Fin Condenser so that it can resist long-term corrosion.
Benefits
We have discussed the many features of the MRCOOL E Star DIY SYSTEM. Believe it or not, those are not the only ways it can serve your cooling needs.
The warranty for the 4th Gen DIY ductless MRCOOL mini splits is the best in the HVAC industry. Specifically, you could sign up for a Lifetime Compressor warranty and a 7-year unit replacement warranty.
These last as long as you follow the terms and conditions. For example, you must register for the MRCOOL Care Kit program to ensure that you maintain your ductless mini splits. The Kit contains the following items:
- Foaming cleaning spray
- Sprayer and bottle for rinsing the MRCOOL DIY unit
- A water collection bag with a drain attachment keeps the house dry while cleaning the ductless mini-split system
The lifetime compressor warranty earns you the standard 5-year parts warranty. If you did not register for the MRCOOL Care Kit, you would still get the standard 7-year compressor and 5-parts warranty.
Are you still thinking about buying your first MRCOOL DIY mini split? Perhaps these additional perks can convince you to confirm your purchase:
Reduced costs

If you live in a location with extremely high or low temperatures, the operating costs for your air conditioner must be astronomical. Fortunately, the MRCOOL ductless mini splits can help you.
The system uses less energy, with the 12k BTU system having a SEER rating of 22. The term “SEER” stands for Seasonal Energy Efficiency Ratio. Most central systems have a SEER of 14, but MRCOOL DIY has 22.
As a result, it keeps your operating expenses low. Here are the other ways the MRCOOL DIY multi-zone systems can help you maintain a budget:
- The mini splits can cool or heat the specific spots that you frequent.
- Also, the MRCOOL DIY heat pump allows you to qualify for tax incentives or a rebate from the manufacturer.
- As mentioned earlier, it does not require special tools, so you will not have to buy them for a new MRCOOL DIY unit. It comes with the tools you need, such as screws and Allen wrenches.
Better air quality
The MRCOOL DIY ductless mini splits maintain cleanliness at home. Traditional HVACs are difficult to clean, and the outside unit could trap pollutants and allergens.
These harmful elements could spread into your living space and reduce the air quality. On the other hand, a wall-mounted air conditioner keeps them out with multi-stage filtration.
The MRCOOL DIY heat pump has filtration cartridges that can keep airborne particles from your living space. They trap microbes, pollen, dander, and mites, so you breathe clean air the entire year.
Ductwork can get clogged and dusty, which may worsen your allergies. The MRCOOL DIY has no ducts that could cause this!
It blows air through filters and out of the air handler. The MRCOOL DIY heat pump can also reduce moisture in your home. As a result, it prevents mildew and mold buildup.
More environmentally friendly
We want to leave a better environment for future generations, so more people are trying to reduce their carbon footprint. Fortunately, the MRCOOL 4th Generation E Star DIY System can help.
The “E” stands for “Energy,” but you could say it also means “environmentally friendly.” The Energy Star certification shows that it follows standards set by the Environmental Protection Agency (EPA).
The MRCOOL DIY heat pump is an “environmentally friendly” star thanks to the following benefits:
First, it uses a safer refrigerant than traditional HVAC systems. MRCOOL uses R410A, so its outdoor mini split does not damage the ozone layer.
As mentioned earlier, it is energy-efficient. MRCOOL DIY does not have ducts that take up 30% of the energy consumption from old-school HVACs.
Another great thing about the multi-zone units is they allow easy DIY installation at any location. You will not have to worry about placing them in awkward spots at home.
Also, you can program the MRCOOL multi-zone units thanks to its variable speed compressor technology and smartphone app.
Quiet operation
You need your room warm or cool, depending on weather conditions. Yet, you want to keep your AC silent no matter what. Fortunately, the MRCOOL mini split minimizes noise with the following features:
- The new MRCOOL DIY system has inverter technology that helps control the compressor motor speed. It reduces noise while maintaining the lifespan of the parts.
- As the name suggests, the ductless mini split system does not need noisy ducts.
- Traditional systems are silent in the first months or years of use. As time passes, these units will make more noise that requires a licensed electrician to fix.
- Moreover, these systems have vibration dampeners and insulated compressor compartments.
How to install the indoor unit
Now that you know about the MRCOOL heat pump system, let us discuss how you can install one. Ensure the following conditions before installing the indoor system:
- Adequate air circulation
- Convenient drainage
- Firm and solid location strong enough to support the unit’s weight
- One meter distance from other electronic devices
Also, make sure it is somewhere that will not disturb other people. Keep the MRCOOL DIY unit away from places like:
- Any source of steam, heat, or combustible materials
- Any flammable items
- Obstacles that may obstruct airflow
- Near a spot where outside air may hit the indoor unit
- Somewhere with direct sunlight exposure
1: Attach the mounting plate to a wall.
Your MRCOOL DIY unit has a cardboard template showing you where to place the screws. Follow these steps once you find it:
- Unfix the screw that attaches the mounting plate to the indoor unit.
- Place the plate against the wall. Use a level to ensure its proper orientation.
- Drill holes in the spots with studs that can support the unit’s weight correspond to the mounting plate holes.
- Secure the mounting plate with the included screws.
2: Drill a hole for connective piping.
- Make a hole in the wall of your chosen area, so the refrigerant piping, signal cable, and drainage pipe can pass through.
- Use the mounting plate to know where the wall hole should be. You will need a core drill that is 3.54 (90 mm) in diameter for proper water drainage.
- Afterward, insert the protective wall sleeve through the hole of the inside wall.
- Trim the protruding bits with a saw or utility knife.
3: Prepare the refrigerant piping.
- Use the mounting plate to determine how you will bend the pipe so it can pass through the wall hole.
- Then, hold the refrigerant piping at its base. Slowly bend it away from the unit at a 90-degree angle.
- It should stick out from behind the MRCOOL unit once you finish. Next, tape the refrigerant and drain pipe together with electrical tape. Do not tape their ends together.
4: Mount the indoor unit.
The unit should now be on your wall, and the pipes should be in the wall hole:
- Confirm that the ends of the refrigerant piping have a tight seal.
- Then, feed the signal wire/MC cable through the wall hole.
- Lift the indoor air handler and feed the taped wires through the wall hole. Be careful with the air handler to avoid damaging it.
- Next, lead the top of the air handler toward the wall.
- Fix the top of the indoor system on the mounting plate’s upper hook.
- Then, apply some pressure on the unit to verify a secure fit.
- Push down further on the unit to snap it onto the bottom hooks.
- Afterward, ensure a tight fit by slightly pressing the unit’s left and right sides.
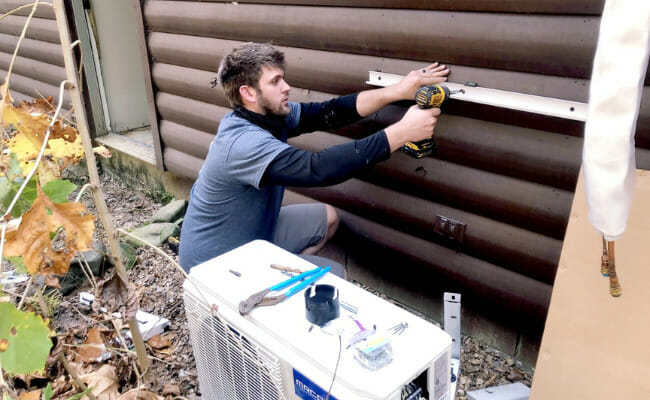
How to install the outdoor unit
You can now proceed with preparing the outdoor system. Check the following criteria to find a suitable location for it:
- Meets spatial requirements
- Good air ventilation and circulation
- Firm and solid place that will not cause the MRCOOL unit to vibrate
- Away from direct sunlight and rain
If you have snow in your area, take the necessary steps to prevent coil damage and ice buildup. Keep the MRCOOL outdoor unit away from places like:
- Plants and animals
- Sources of combustible materials
- Obstacles that may obstruct airflow
- Dusty locations
- Somewhere with salty air and forced water
Step 1: Install the drain joint.
You will need to attach the drain joint to the bottom of the unit. If it comes with a rubber seal, follow these steps:
- Attach the rubber seal on the end of the drain joint that connects to the outdoor system.
- Then, insert the drain joining into the hold in the unit’s base pan.
- Rotate the drain joint at a 90-degree angle until it clicks in place.
- Connect a drain hose extension to the drain joint. Note that the MRCOOL DIY unit does not come with this accessory.
If the drain joint does not have a rubber seal, insert it into the hold of the unit’s base pan. Then, connect a drain hose extension to the drain joint.
Step 2: Anchor the outdoor unit.
You could fix the outdoor system to the ground or wall with M-10 bolts. Follow the dimensions specified in the manual. Then, follow these steps to anchor it to the ground:
- Mark the positions for four expansion bolts using the Mounting Dimensions chart.
- Then, pre-drill the holes for the expansion bolts.
- Clean dust away from the holes.
- Next, place a nut at the end of each bolt.
- Hammer them into the pre-drilled holes.
- Remove the nuts from the expansion bolts, then place the outdoor system on the bolts.
- Place a washer on each bolt, then reinstall the nuts.
- Lastly, tighten each nut using a wrench.
You will also use these steps if you want to attach the MRCOOL unit to a wall. Note that the wall should be strong enough to support four times the weight of the unit.
Conclusion
You learned all you can about the MRCOOL E Star DIY System. If you are not fond of reading, you could visit the MRCOOL YouTube channel for tutorial videos.
Those will show you how to install the units in real life so that new users can follow along. Please follow all safety precautions while you are installing your MRCOOL unit.
Wear safety goggles while drilling the wall holes. If you are familiar with handling electrical wiring, please request help from a licensed electrician.
FAQs
Can I install MRCOOL myself?
The MRCOOL E Star system allows for easy DIY installation. You will not need special tools and training to set up this appliance in your home.
How long do mini splits last?
The MRCOOL DIY mini splits can last 10 to 30 years if you maintain them properly. That is why signing up for the MRCOOL Care Kit program is a good idea.
How much does it cost to install MRCOOL?
The cost of installing a MRCOOL unit at home starts at around $1,700 (note that this amount may vary based on various factors.) Unlike other brands, it lets you install one without technical skills and tools.
